manual d700 nikon
The Nikon D700 is a professional-grade, full-frame DSLR camera featuring a 12.1-megapixel CMOS sensor, delivering exceptional image quality and low-light performance. Designed for enthusiasts and professionals, it combines the D3’s image capabilities with the D300’s ergonomic design, offering a compact yet powerful tool for photography. With an ISO range of 100-6400, compatibility with Nikon’s extensive lens lineup, and advanced features like Live View and video recording, the D700 remains a versatile choice for capturing stunning images in various conditions.
1.1 Overview of the Nikon D700
The Nikon D700 is a professional-grade, full-frame DSLR camera featuring a 12.1-megapixel CMOS sensor. It combines the image quality of the D3 with the functionality of the D300, offering a compact and lightweight design. The camera supports a wide ISO range of 100-6400, ensuring excellent low-light performance. Designed for enthusiasts and professionals, it features intuitive controls, compatibility with Nikon F-mount lenses, and advanced modes like Live View and video recording, making it a versatile tool for diverse photography needs.
1.2 Key Features of the Nikon D700
The Nikon D700 boasts a 12.1-megapixel full-frame CMOS sensor, offering exceptional image quality and low-light performance. It features an ISO range of 100-6400, expandable to 25600, and supports 14-bit RAW files for precise tonal control. The camera includes a 3-inch LCD screen, Live View functionality, and HD video recording capabilities. Its weather-sealed body, compatibility with Nikon F-mount lenses, and advanced autofocus system make it a robust tool for professional and enthusiast photographers seeking high-quality results in various shooting conditions.
1.3 Importance of the Manual for Nikon D700
The Nikon D700 manual is essential for unlocking the camera’s full potential, providing detailed guidance on advanced features, customization options, and troubleshooting. It helps users navigate the menu system, understand shooting modes, and optimize settings for various conditions. Whether you’re a professional or an enthusiast, the manual ensures mastery of the D700’s capabilities, enabling you to achieve superior results in photography and video recording.
Key Components and Controls
The Nikon D700 features a full-frame CMOS sensor, offering exceptional image quality. Its intuitive controls include a mode dial, multi-selector, and LCD screen for easy navigation and adjustments.
2.1 External Controls and Their Functions
The Nikon D700 features a range of external controls designed for intuitive operation. The mode dial allows quick access to shooting modes like Manual, Aperture Priority, and Shutter Priority. The shutter release button, located on the top right, enables precise control over capturing images. The multi-selector on the rear facilitates navigation and AF point selection. Additional buttons like Photo Info/Playback and the FUNC button provide instant access to key settings and functions, streamlining workflow during photography sessions.
2.2 Menu System and Navigation
The Nikon D700’s menu system is user-friendly, offering easy access to settings through its LCD screen. The menu is divided into tabs, including Shooting, Custom, and Setup options. Navigating is done via the multi-selector, allowing users to scroll through and select options efficiently. The back button confirms selections, ensuring quick adjustments. This intuitive design simplifies camera operation, enabling photographers to focus on capturing images without unnecessary delays. The menu also provides clear descriptions for each setting, enhancing usability.
2.3 Customization Options
The Nikon D700 offers extensive customization options to tailor the camera to individual preferences. Users can assign specific functions to buttons, such as the Fn button and multi-selector, for quick access to frequently used settings. Additionally, custom shooting settings can be saved and loaded, allowing for seamless transitions between different shooting scenarios. The camera also supports menu customization, enabling users to display only the options they need, enhancing efficiency and personalization.
Shooting Modes
The Nikon D700 offers four primary shooting modes—Manual (M), Aperture Priority (A/Av), Shutter Priority (S/Tv), and Program (P)—providing flexibility for photographers of all skill levels.
3.1 Understanding Manual Mode (M)
Manual Mode (M) on the Nikon D700 gives full control over aperture and shutter speed, allowing photographers to adjust settings for precise exposure. The camera’s exposure meter guides adjustments, but settings are manual. This mode is ideal for creative control and learning photography fundamentals, offering flexibility in various lighting conditions to achieve desired artistic results.
3.2 Aperture Priority Mode (A/Av)
Aperture Priority Mode (A/Av) allows users to set the aperture, while the camera automatically adjusts the shutter speed for proper exposure. This mode is ideal for controlling depth of field, ensuring sharpness across multiple planes or creating a blurred background; Photographers can experiment with different f-stops to achieve artistic effects, making it a versatile option for portraits, landscapes, and creative compositions. The D700 excels in this mode, offering precise control over lighting and focus.
3.3 Shutter Priority Mode (S/Tv)
Shutter Priority Mode (S/Tv) enables users to set the shutter speed manually, with the camera adjusting the aperture for optimal exposure. This mode is perfect for capturing motion, allowing control over freezing fast-moving subjects or creating artistic blur. Ideal for sports, wildlife, and low-light photography, it offers flexibility in managing exposure while maintaining creative control. The D700’s precise metering ensures balanced results, making it a favorite among photographers seeking dynamic motion capture.
3.4 Program Mode (P)
Program Mode (P) offers a balance between automation and control, ideal for quick shooting situations. The camera automatically sets both aperture and shutter speed but allows adjustments to ISO, exposure compensation, and other settings. This mode is perfect for beginners or when time is limited, providing flexibility while ensuring well-balanced exposures. It leverages the D700’s advanced metering system to deliver sharp, properly exposed images in various lighting conditions, making it a versatile choice for everyday photography.
Autofocus and Metering
The Nikon D700’s autofocus system provides multiple modes for precise focus. Metering options include matrix, center-weighted, and spot modes to ensure accurate exposure in diverse lighting scenarios.
4.1 Autofocus Modes and Settings
The Nikon D700 offers advanced autofocus modes, including Single-Servo AF (AF-S) for stationary subjects and Continuous-Servo AF (AF-C) for moving subjects. The camera also features Manual Focus (MF) for precise control. Users can customize AF settings, such as focus area selection and AF-C priority, to suit different shooting scenarios. These options ensure sharp focus in various conditions, enhancing overall image quality and versatility.
4.2 Metering Modes Explained
The Nikon D700 features three metering modes: Matrix, Center-Weighted, and Spot. Matrix metering analyzes the entire scene for balanced exposure, while Center-Weighted prioritizes the central area. Spot metering measures light from a small, selectable section, ideal for high-contrast situations. These modes ensure accurate exposure control, allowing photographers to adapt to various lighting conditions and achieve desired results with precision and flexibility.
4.3 Customizing Autofocus for Different Subjects
The Nikon D700 allows customization of autofocus settings to suit various subjects. For dynamic or fast-moving subjects, AF-C mode with dynamic area AF is ideal, while AF-S mode excels for stationary or portrait photography. Users can assign specific AF modes to customizable buttons, enabling quick adjustments. Additionally, the camera supports fine-tuning AF for different lenses, ensuring precise focus control tailored to individual shooting needs and enhancing overall autofocus accuracy and versatility.
ISO and Noise Performance
The Nikon D700 offers an ISO range of 100-6400, delivering excellent low-light performance. It balances noise reduction with detail retention, ensuring sharp images even at higher sensitivities.
5;1 ISO Range and Sensitivity
The Nikon D700 features an ISO range of 100 to 6400, ensuring versatility in various lighting conditions. Its full-frame sensor provides excellent sensitivity, capturing detail in both bright and low-light environments. The camera maintains impressive noise control, delivering clean images even at higher ISO settings, making it suitable for professional and enthusiast photographers seeking consistent results across a wide range of scenarios.
5.2 Managing Noise at High ISOs
The Nikon D700 excels at minimizing noise, even at higher ISOs. Built-in noise reduction helps maintain image clarity, though it may soften details slightly. For optimal results, shoot in RAW format to retain maximum flexibility during post-processing. Using external noise reduction software can further refine images. Balancing ISO settings with lighting conditions ensures sharp, grain-free photos, making the D700 a reliable choice for low-light photography without compromising quality.
5.3 Best Practices for ISO Settings
For optimal results with the Nikon D700, use the lowest necessary ISO to minimize noise. ISO 100-400 is ideal for bright conditions, while ISO 800-6400 is suitable for low light. Shoot in RAW to retain detail and adjust noise reduction in post-processing. Enable High ISO NR for smoother images at higher sensitivities. Adjust ISO based on lighting conditions to balance noise and image quality, ensuring sharp and clean photos in various shooting scenarios.

White Balance and Color Accuracy
The Nikon D700 offers multiple white balance modes, including Auto, Daylight, Shade, Fluorescent, and custom settings, ensuring accurate color representation. Use the MENU button to adjust these settings for precise control over your images’ color accuracy and to minimize unwanted color casts in various lighting conditions. The camera also features Active D-Lighting for enhanced contrast and color reproduction in high-contrast scenes.
6.1 Understanding White Balance Modes
White balance ensures accurate color representation by adjusting to lighting conditions. The Nikon D700 offers modes like Auto, Daylight, Shade, and Fluorescent, each optimized for specific environments. Custom settings allow precise control, while Active D-Lighting enhances contrast in high-contrast scenes, preserving details and colors for professional-grade results. Access these settings via the MENU button for tailored adjustments, ensuring your images reflect the true colors of your subject matter with clarity and precision.
6.2 Custom White Balance Settings
Custom white balance on the Nikon D700 allows precise color accuracy by setting a reference object. Use the PRESET manual mode to capture a white or gray object, ensuring neutral tones. Save the setting for specific lighting conditions, like fluorescent or mixed light, to maintain consistent colors. This feature is ideal for professional results, enabling photographers to adapt to unique environments and achieve accurate hues in every shot.
6.3 Color Space and Picture Controls
The Nikon D700 offers two color space options: sRGB and Adobe RGB, catering to different photographic needs. sRGB is ideal for web and printing, while Adobe RGB provides a wider color range for professional workflows. Picture Controls allow customization of image parameters like sharpening, contrast, and saturation, enabling tailored results. Users can save up to nine custom Picture Controls, enhancing creativity and consistency in their photography.

Advanced Custom Settings
The Nikon D700 allows users to save and load custom settings, assign functions to buttons, and personalize the menu system for streamlined workflows and enhanced creativity.
7.1 Saving and Loading User Settings
The Nikon D700 enables users to save custom settings, ensuring quick access to preferred configurations. Settings can be stored in the camera’s internal memory or on memory cards, allowing seamless transitions between different shooting scenarios. This feature is particularly useful for photographers who frequently switch between setups, such as portrait, landscape, or low-light photography, streamlining their workflow and enhancing productivity.
7.2 Assigning Functions to Buttons
The Nikon D700 allows customization of button functions, enhancing workflow efficiency. Users can assign specific tasks to buttons like the FUNC button or Multi Selector, enabling quick access to frequently used settings such as ISO, white balance, or bracketing. This feature streamlines operations, reducing time spent navigating menus and allowing photographers to focus on capturing moments seamlessly. Custom assignments can be saved for consistent use across different shooting scenarios.
7.3 Customizing the Camera Menu
The Nikon D700 allows users to customize its menu system to suit individual preferences, improving workflow efficiency. By accessing the menu setup options, photographers can tailor the display to show only frequently used settings, hiding unnecessary options. This feature enhances navigation and reduces clutter, enabling quick access to critical functions during shoots. Customized menus can be saved, ensuring consistent and personalized control over the camera’s operations for various photography scenarios.

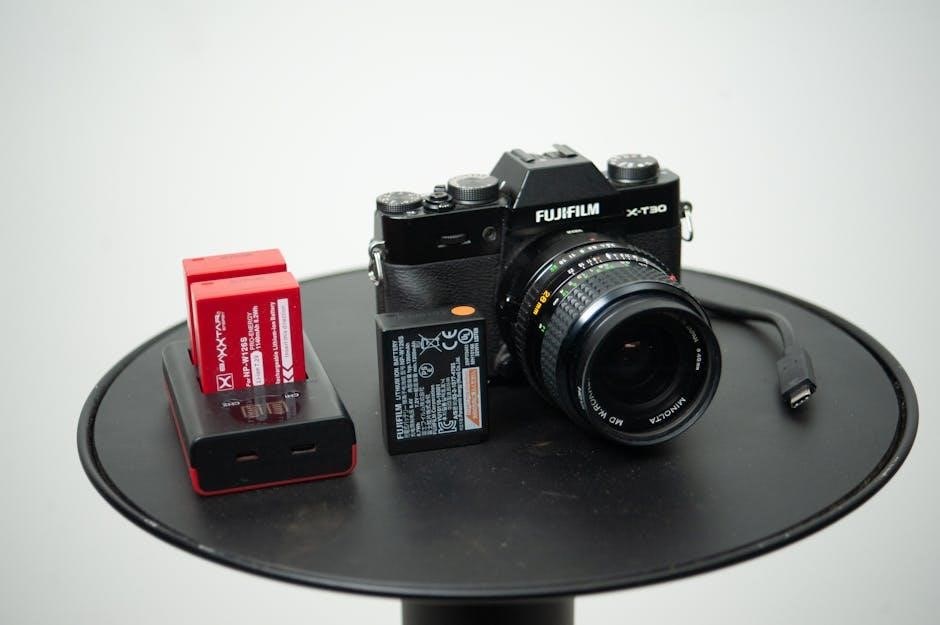
Accessories and Equipment
The Nikon D700 supports a wide range of accessories, including Nikkor lenses, external Speedlights, and memory cards. Compatible batteries like the EN-EL3e ensure extended shooting sessions.
8.1 Compatible Lenses and Accessories
The Nikon D700 is compatible with a wide range of Nikkor lenses, including AF-S, AF-D, and legacy models, thanks to its Nikon F-mount. Popular choices include the 70-200mm f/2.8 and 24-70mm f/2.8 for professional results. Accessories like the MB-D10 battery grip extend shooting capabilities, while Speedlights and external flashes enhance lighting control. Memory cards, such as CF and SD, ensure ample storage, and protective gear like cases and filters safeguard the equipment.
8.2 Using External Flash and Speedlights
The Nikon D700 supports external flash units and Speedlights, enhancing lighting control for professional results. Compatible with Nikon’s i-TTL metering system, these accessories ensure balanced exposures. External flashes like the SB-900 or SB-700 offer creative freedom, enabling off-camera illumination and wireless operation. For optimal results, use diffusers or umbrellas to soften harsh light. Always refer to the Speedlight manual for detailed setup instructions and advanced functionality; This transforms your lighting capabilities in various photography scenarios.
8.3 Memory Cards and Storage Solutions
The Nikon D700 supports CFexpress 2.0 memory cards, ensuring fast data transfer speeds and reliable storage. For optimal performance, use high-quality cards with sufficient capacity to handle large image files and video recording. Regularly format cards in the camera to maintain performance and prevent data corruption. Always store cards in protective cases to avoid damage. Refer to the manual for detailed compatibility and storage recommendations to ensure flawless operation during photo and video sessions.
Maintenance and Care
Regularly clean the camera and sensor with a soft cloth and avoid harsh chemicals. Store the D700 in a dry, cool place to prevent damage. Always handle with care to maintain optimal performance and longevity. Check for firmware updates to ensure the latest features and improvements are installed. Proper maintenance ensures the camera operates at its best for years to come.
9.1 Cleaning the Camera and Sensor
Use a microfiber cloth to gently wipe the camera body and LCD screen. For the sensor, activate the camera’s cleaning mode and use a bulb blower to remove dust. Avoid touching the sensor or using liquids, which can damage it. For stubborn spots, use a Nikon-approved cleaning kit. Regular cleaning ensures optimal image quality and prevents dust from appearing in photos. Always handle the camera with care to avoid scratches or damage to sensitive components.
9.2 Updating Firmware
To update the Nikon D700’s firmware, visit Nikon’s official website and download the latest version. Use a formatted memory card to transfer the update. Insert the card, power on the camera, and follow on-screen instructions. Ensure the battery is fully charged to prevent interruptions. Updating firmware enhances performance, adds features, and fixes issues. Always use genuine Nikon software to avoid compatibility problems. Regular updates keep your camera optimized for the best functionality and image quality. Follow all safety precautions to avoid damaging the device.
9.3 Battery and Power Management
The Nikon D700 uses the EN-EL3e lithium-ion battery, offering long shooting sessions. Charge the battery using the supplied MH-18a charger. Avoid overcharging, as it can reduce battery life. Turn off unnecessary features like GPS or Wi-Fi to conserve power. Use the correct shooting mode for your needs to maximize battery efficiency. If the battery is exhausted, use an AC adapter or spare battery; Regularly check battery health and replace it if performance declines. Always use genuine Nikon accessories for reliable performance and optimal functionality.
Troubleshooting Common Issues
Address common issues like error messages, autofocus malfunctions, and connectivity problems by consulting the manual for specific solutions, ensuring optimal performance and resolving operational hiccups effectively.
10.1 Resolving Error Messages
When encountering error messages on your Nikon D700, refer to the manual for specific solutions. Common issues include “ERR” for system malfunctions or “Card” for memory card errors. Restarting the camera often resolves temporary glitches. For persistent errors, ensure firmware is updated or contact Nikon support for professional assistance. Always use compatible accessories to avoid conflicts and maintain optimal performance.
10.2 Fixing Autofocus Problems
To resolve autofocus issues on the Nikon D700, ensure proper communication between the lens and camera body. Clean the sensor and lens contacts regularly. Check lens compatibility and update firmware if necessary. Use the correct AF mode for your subject. If problems persist, reset the camera to default settings or consult the manual for advanced troubleshooting steps. Proper calibration and maintenance can help restore accurate autofocus performance.
10.3 Solving Connectivity Issues
To address connectivity problems with the Nikon D700, start by resetting the camera to its default settings. Ensure all connections, such as USB cables or memory cards, are secure and functioning properly. Use compatible cables and check for firmware updates. If transferring images, verify the card reader or transfer software settings. Consulting the manual or online resources can provide additional troubleshooting steps to resolve connectivity concerns effectively.

Video and Live View
The Nikon D700 offers Live View mode for precise focus control and framing. It supports video recording, allowing users to capture high-quality footage. Tips for better video include using manual settings, ensuring proper lighting, and stabilizing the camera with a tripod for smooth results.
11.1 Using Live View Mode
Activate Live View mode on the Nikon D700 by pressing the designated button, enabling real-time preview on the LCD screen. This feature aids in precise focus control, especially for macro or still-life photography. Use the multi-selector to adjust focus point placement. Live View also supports face detection and contrast detection AF. For optimal results, use a tripod to minimize camera shake and ensure sharp images. This mode enhances creative composition and focus accuracy.
11.2 Recording Video with the Nikon D700
The Nikon D700 supports video recording in live view mode, offering a maximum resolution of 720p at 24fps. To start recording, enable live view, frame your shot, and press the shutter release. Use manual focus or autofocus before recording begins. Stabilize the camera with a tripod for smoother footage. While the D700 lacks 1080p resolution, its full-frame sensor ensures excellent low-light performance and shallow depth of field, making it suitable for creative video projects.
11.3 Tips for Better Video Quality
For optimal video quality with the Nikon D700, use a tripod to minimize camera shake and ensure stability. Enable manual focus to maintain sharpness and avoid autofocus noise. Utilize external microphones for clearer audio. Shoot in neutral colors or flat profiles for better post-processing flexibility. Adjust white balance according to lighting conditions to achieve accurate colors. Lastly, use the Nikon Manual Viewer 2 app for detailed settings guidance to enhance your video results.
The Nikon D700 excels in performance and image quality, offering versatility for photographers. Use the manual to master its features and optimize settings for stunning results consistently.
12.1 Summary of Key Features and Settings
The Nikon D700 offers a 12.1MP full-frame CMOS sensor, ISO 100-6400, and 51-point autofocus. It features manual controls, metering modes, and RAW image capture. The camera supports Nikon F-mount lenses and includes a built-in flash. Settings like white balance, Picture Controls, and custom functions enhance creativity. Its durable magnesium-alloy body ensures reliability in tough conditions, making it a versatile tool for professionals and enthusiasts alike.
12.2 Advanced Techniques for Mastering the Nikon D700
Master the Nikon D700 by exploring advanced techniques like using Live View for precise manual focusing and dynamic range optimization. Experiment with exposure bracketing for HDR captures and leverage custom Picture Controls for tailored color profiles. Utilize external flash units for balanced lighting and explore the camera’s video capabilities for storytelling. Customizing autofocus settings and button assignments can streamline your workflow, ensuring you capture every moment with precision and creativity.